
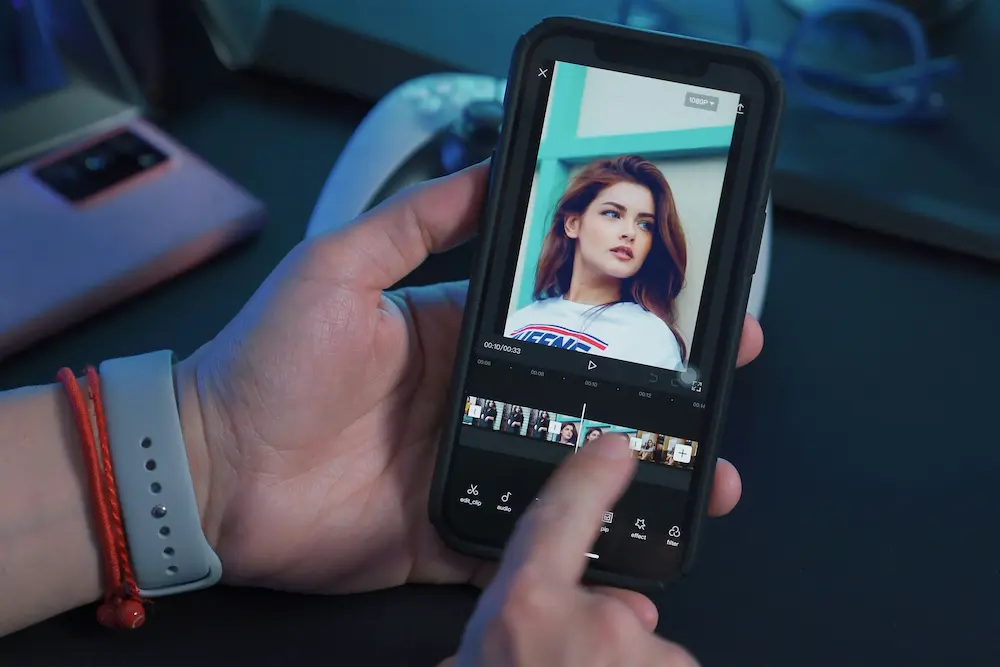
CapCut can generate synchronized captions from the speech in a video’s audio. The basic process is to open the automatic-caption tool, select the language being spoken, generate the captions, correct the resulting text and timing, style it, and then preview the finished video before export.
The workflow is available across CapCut mobile, desktop and web, as documented in CapCut’s official auto-caption instructions. Menu names, placement and available options can vary by CapCut version, platform, account or region, so use the labels visible in your current interface rather than expecting every screen to look identical.
Prepare the video and find Auto Captions on each platform
Open the CapCut project containing the video you want to caption. Make sure the video is on the timeline and contains audible speech. Auto Captions analyzes that existing audio, so you do not need to type each caption before starting.
Android and iPhone
- Open your project in the CapCut mobile app.
- Select the video or move the playhead to the section containing speech.
- Look for the caption controls and open Auto Captions. Depending on the app version, the caption tool or its entry point may appear under a differently positioned text or caption control.
- Confirm that CapCut is set to recognize the audio used in your project.
Windows and macOS
- Open the project in CapCut Desktop and check that the video is present on the timeline.
- Open the area labeled Captions, then choose Auto Captions.
- If those labels are not in the expected location, look for the caption or text workspace in your installed version rather than selecting a manual text tool.
CapCut Web
- Open your project in CapCut Web from a desktop browser.
- Confirm that the video and its audio are available on the editing timeline.
- Open Captions and select Auto Captions.
CapCut Web may place generated text and formatting controls in areas labeled Subtitles and Styles, but these labels are version-sensitive. This guide covers automatic transcription of the video’s spoken audio, not manual, translated or bilingual subtitle workflows.
Select the spoken language and generate the captions
The recognition language should match the language actually spoken in the source audio. Selecting a different language can produce inaccurate or unusable text, even when the speech itself is clear.
- Open the language selector in the Auto Captions controls.
- Choose the language spoken in the video. Do not assume that every language or recognition option is available on every platform or in every region.
- Check that the intended video audio is being used for recognition if CapCut presents an audio-source choice.
- Start the automatic-caption generation process.
- Wait until CapCut has created the synchronized caption segments before beginning detailed edits.
Once generation finishes, play a short portion of the project to confirm that caption segments appear with the speech. If CapCut does not generate any captions, use CapCut’s auto-caption troubleshooting page; detailed failed-generation diagnosis is separate from the normal workflow covered here.
Review and edit the caption text and timing
Automatic transcription is a starting point, not a final proofread. Review the complete video while listening to the original speech, and edit each caption segment where necessary.
- Start playback near the beginning of the first generated caption.
- Compare the displayed text with the words being spoken.
- Select a caption segment to correct its text.
- Check when the segment appears and disappears. Adjust its timing with the controls available in your version if it starts too early, lingers too long or misses part of the spoken phrase.
- Review line breaks so that phrases are divided naturally and remain easy to read.
- Continue through the entire project instead of assuming later captions match the accuracy of the first few.
Pay particular attention to details that speech recognition commonly requires a person to verify:
- Names and specialized terms: Check people, places, brands, product names and technical vocabulary.
- Numbers: Confirm dates, quantities, prices, measurements and other figures against the audio.
- Punctuation: Add or correct punctuation where it improves meaning and readability.
- Similar-sounding words: Use the surrounding sentence to resolve words that sound alike.
- Timing: Make sure each caption corresponds to the speech heard at that moment.
- Line breaks: Avoid splitting a short phrase in a place that makes it difficult to understand.
Replay edited sections immediately after changing them. This makes it easier to catch a corrected sentence that is accurate as text but no longer fits its available on-screen time.
Style auto captions for readability
After correcting the transcription, use CapCut’s caption styling controls to make the text readable over the video. Available fonts, templates, effects and other controls can differ between mobile, desktop and web, but the same readability principles apply.
- Use a legible size: The text should be readable without dominating the frame. Preview it at the size viewers are likely to use.
- Create contrast: Choose text and any outline, shadow or background treatment so the words remain visible over both bright and dark footage.
- Keep placement consistent: Position captions where they do not cover faces, demonstrations, interface elements or other important visual information.
- Avoid overcrowding: If a caption contains too much text at once, revisit its line breaks or timing rather than shrinking it until it becomes difficult to read.
- Use restrained animation: If your version provides caption animation, check that movement does not make the words harder to follow.
Select a generated caption and open the available style controls. On CapCut Web, these may currently appear in a Styles area after the generated text is shown under Subtitles. On mobile and desktop, follow the caption-formatting controls shown for the selected segment.
Do not assume that one edit automatically affects every caption segment. After applying a design, inspect several captions from different parts of the timeline to confirm that the formatting is consistent. If your current interface offers a control that applies a style across all generated captions, preview the complete result after using it.
Test the design over several different frames, not just the frame where you created it. A caption that looks clear over a dark opening shot may disappear over a brighter scene later in the video. CapCut’s subtitle guide also documents the cross-platform editing, readability and export workflow.
Preview and export the captioned video
Run one complete preview before exporting. Listen to the audio while watching the captions rather than reviewing the text in isolation.
- Play the video from beginning to end.
- Check that every spoken section that needs a caption has corresponding text.
- Correct remaining errors in names, numbers, wording and punctuation.
- Watch for captions that appear too early, disappear too soon or remain after the speaker has finished.
- Check line breaks and make sure captions remain readable over changing backgrounds.
- Inspect the opening and final caption segments so none are accidentally clipped at the project boundaries.
- Use CapCut’s export action after the review is complete.
Because export controls and available settings vary by platform and version, choose the settings appropriate for your project rather than relying on a universal preset. After export, open the resulting video and inspect several captioned moments, including the beginning, middle and end, to confirm that the finished result looks and sounds as expected.
Can I add auto captions in CapCut on mobile, desktop and web?
Yes. CapCut officially documents automatic-caption workflows for its mobile, desktop and web editors. The exact menu placement, labels and available options can vary by platform, version or region.
Can I edit CapCut auto captions after they are generated?
Yes. After generation, you can review and edit the caption text, timing and style before previewing and exporting the video. Check the entire project because automatic transcription can require corrections.
Which language should I select for CapCut auto captions?
Select the language actually spoken in the video’s source audio. Available languages and recognition options may differ by platform or region.