
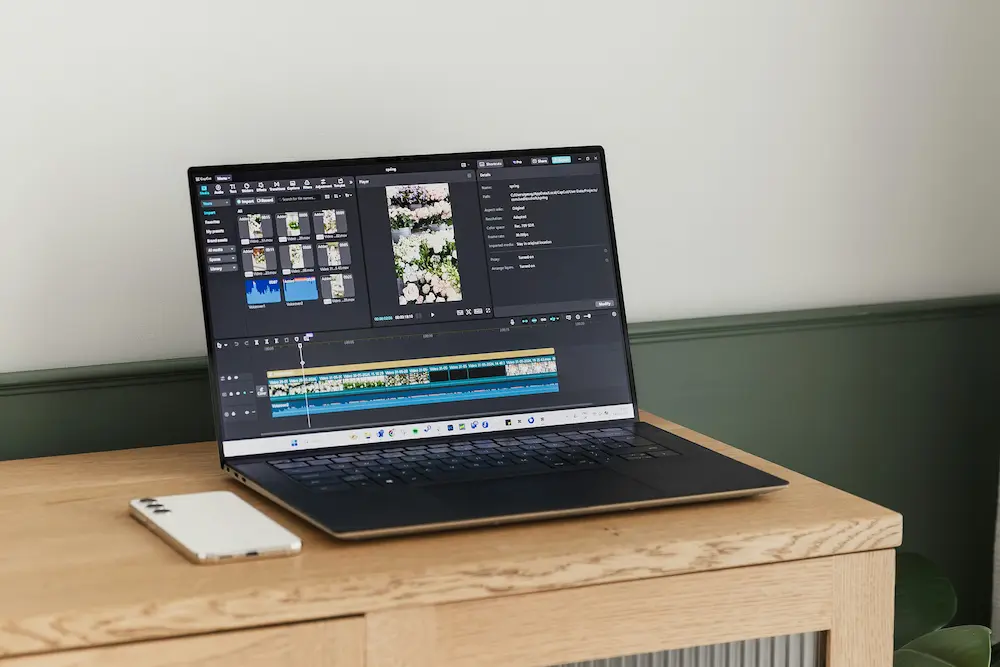
CapCut keyframes save the state of a visual property at a particular point in the timeline. Add a starting state and a later ending state, and CapCut animates the change between them. This lets you create movement such as a gradual zoom and pan without using a preset animation.
The same basic method applies on mobile, desktop and the web: select a supported visual element, place the playhead, set a keyframe, move the playhead and change the same property. The location of the controls varies by platform and CapCut version, so this guide identifies them by their function and diamond-shaped icon rather than relying on one fixed interface path.
What CapCut keyframes do
A keyframe records a property state at a specific time. For example, a starting keyframe can record a clip at its normal size in the center of the frame. An ending keyframe can record that clip enlarged and shifted toward one side. CapCut calculates the intermediate frames, producing a continuous zoom-and-pan movement.
CapCut officially documents these keyframe properties:
- Position: Changes where the selected visual appears in the frame.
- Scale: Enlarges or reduces the selected visual.
- Rotation: Turns the visual between two recorded angles.
- Opacity: Changes how transparent or visible the visual is.
Property availability can depend on the selected item, platform and current version. A standard video clip is a practical choice for a first attempt because some grouped or template-based items may not support keyframes.
Do not confuse the playhead with a keyframe marker. The playhead shows the current time and moves as you navigate the project. A keyframe marker records a property state at its timeline position. CapCut commonly represents the keyframe control and markers with a diamond shape.
CapCut’s PC keyframe tutorial confirms the diamond-control workflow and the documented position, scale, rotation and opacity examples.
Create a simple zoom-and-pan animation with two keyframes
This example starts with a normally framed clip and ends with the image enlarged and shifted toward the main subject. Use a clip with enough duration to see the movement clearly.
- Select the clip. Choose the supported video clip or visual element you want to animate in the timeline. The keyframe controls apply to the selected item.
- Set the starting time. Move the playhead to the point where the zoom and pan should begin.
- Save the starting state. Open the relevant visual property controls and use the diamond-shaped keyframe control to record the starting position and scale. Keep the subject framed as you want it to appear at the beginning.
- Move to the ending time. Drag the playhead forward. A shorter interval creates faster movement, while a longer interval makes the change more gradual.
- Create the ending state. Increase the scale and reposition the image so the frame moves toward the subject. In CapCut’s documented workflow, changing the same property after moving the playhead creates the next state, and CapCut animates the transition between the two points.
- Preview the full interval. Start playback shortly before the first keyframe and watch through the second one. Check both the speed and the final framing.
If the zoom finishes too quickly, increase the time between the starting and ending keyframes. If it feels too slow, reduce that interval. If the subject moves out of frame, return to the ending keyframe and adjust the position or scale while the playhead is aligned with that keyframe.
Keep the first test simple. Position and scale are enough to demonstrate how two saved states work; rotation and opacity can be explored later with the same underlying method.
Use the keyframe controls on mobile, desktop and web
Android, iPhone, Windows, macOS and CapCut Web use the same starting-state and ending-state concept, but their layouts are not identical. Select the element first, then look for the diamond control associated with the property you want to animate.
Android and iPhone
On Android or iPhone, select the clip in the timeline and place the playhead at the intended starting time. Find the diamond-shaped keyframe control shown for the selected visual or its editable properties, then use it to save the first state. Move the playhead later and change the same property to establish the ending state.
The exact toolbar position and labels are not fully documented in the official sources reviewed and can change between mobile releases. Do not assume the Android and iPhone arrangements are identical. If the diamond is not visible immediately, confirm that the clip itself is selected and inspect the currently displayed controls for that selected visual rather than following a menu path from an older version.
Windows and macOS
On desktop, select a supported timeline clip and open its visual property controls. Use the diamond beside the relevant property to record the starting state, move the playhead and then change that property for the ending state. CapCut documents this workflow for PC, including position, scale, rotation and opacity.
Windows and macOS may differ in panel arrangement depending on the installed release. Identify the control by its diamond icon and its relationship to the property rather than assuming every panel appears in the same place.
CapCut Web
In CapCut Web, select the visual element in the timeline, open the relevant visual controls and locate the diamond control for the property. Set the initial state at the first playhead position, move the playhead and modify the same property to create the next state.
The browser editor has a different layout from the desktop application. CapCut’s online keyframe guide confirms that the web editor supports the basic keyframe workflow, including changing a property after moving to a later point.
| Platform | Control to identify | Shared workflow |
|---|---|---|
| Android | Diamond control for the selected visual or property; placement can vary | Select, set the first state, move the playhead, change the same property |
| iPhone | Diamond control for the selected visual or property; placement can vary | Select, set the first state, move the playhead, change the same property |
| Windows | Diamond beside the relevant property control | Select, set the first state, move the playhead, change the same property |
| macOS | Diamond beside the relevant property control; panel arrangement may differ | Select, set the first state, move the playhead, change the same property |
| CapCut Web | Diamond in the relevant visual property controls | Select, set the first state, move the playhead, change the same property |
Preview, correct and find missing keyframes
Preview the complete interval from just before the first keyframe until just after the second. Looking only at the ending frame will not reveal whether the movement is too fast, too slow or poorly framed.
- The movement is too fast: Increase the timeline distance between the starting and ending keyframes.
- The movement is too slow: Place the keyframes closer together.
- The final framing is wrong: Align the playhead with the ending keyframe before correcting position or scale so you do not unintentionally create another state at a different time.
- The animation starts at the wrong moment: Reposition the relevant starting marker using the controls available in your current interface.
- An unwanted marker was added: Select the marker and use the available removal control. The exact delete action differs by interface, so verify which marker is selected before removing it.
If the keyframe control is missing on Windows or macOS, first confirm that a clip is selected. Next, check whether the selected item supports keyframes and whether its relevant property panel is hidden or closed. CapCut lists these as documented causes in CapCut’s missing-keyframes guidance.
Some grouped or template-based items may not provide the expected control. If that happens, return to a standard supported clip for the basic exercise. Panel placement can also change after an update, and the web, desktop and mobile layouts should not be treated as interchangeable.
Before finishing the project, preview the complete animation once more and confirm that the first and last frames are composed correctly. If you want to continue with a separate spoken-audio workflow, see how to add auto captions in CapCut.
Does CapCut add the second keyframe automatically?
In CapCut’s documented workflow, you set the first state, move the playhead and change the same property. That change establishes the next state, and CapCut creates the transition between the two points. The exact behavior and available properties can vary with the selected item, platform and version.
Why can’t I see the keyframe control in CapCut on PC?
Confirm that a timeline clip is selected, check whether the selected item supports keyframes and make sure the relevant property panel is visible. CapCut identifies no selected clip, an unsupported element and a hidden panel as possible causes.
Which properties can keyframes animate in CapCut?
CapCut officially documents position, scale, rotation and opacity as keyframe properties. Availability can depend on the selected item, platform and current CapCut version, so not every visual element should be assumed to support every property.